


-n5A0H1sET6TWzZxTyM8bN0PcMEaEIXUjdEZX.jpg)
TOPICS
2. Enable TOTP.
I. USEFUL LINKS
Trading terminal: https://cubeplus.tradejini.com
Developer Portal: https://api.tradejini.com/developer-portal/main
Account opening link for Rs. 20 per order brokerage: https://bit.ly/QuantiplyTradejini
II. ENABLE TOTP (Optional)
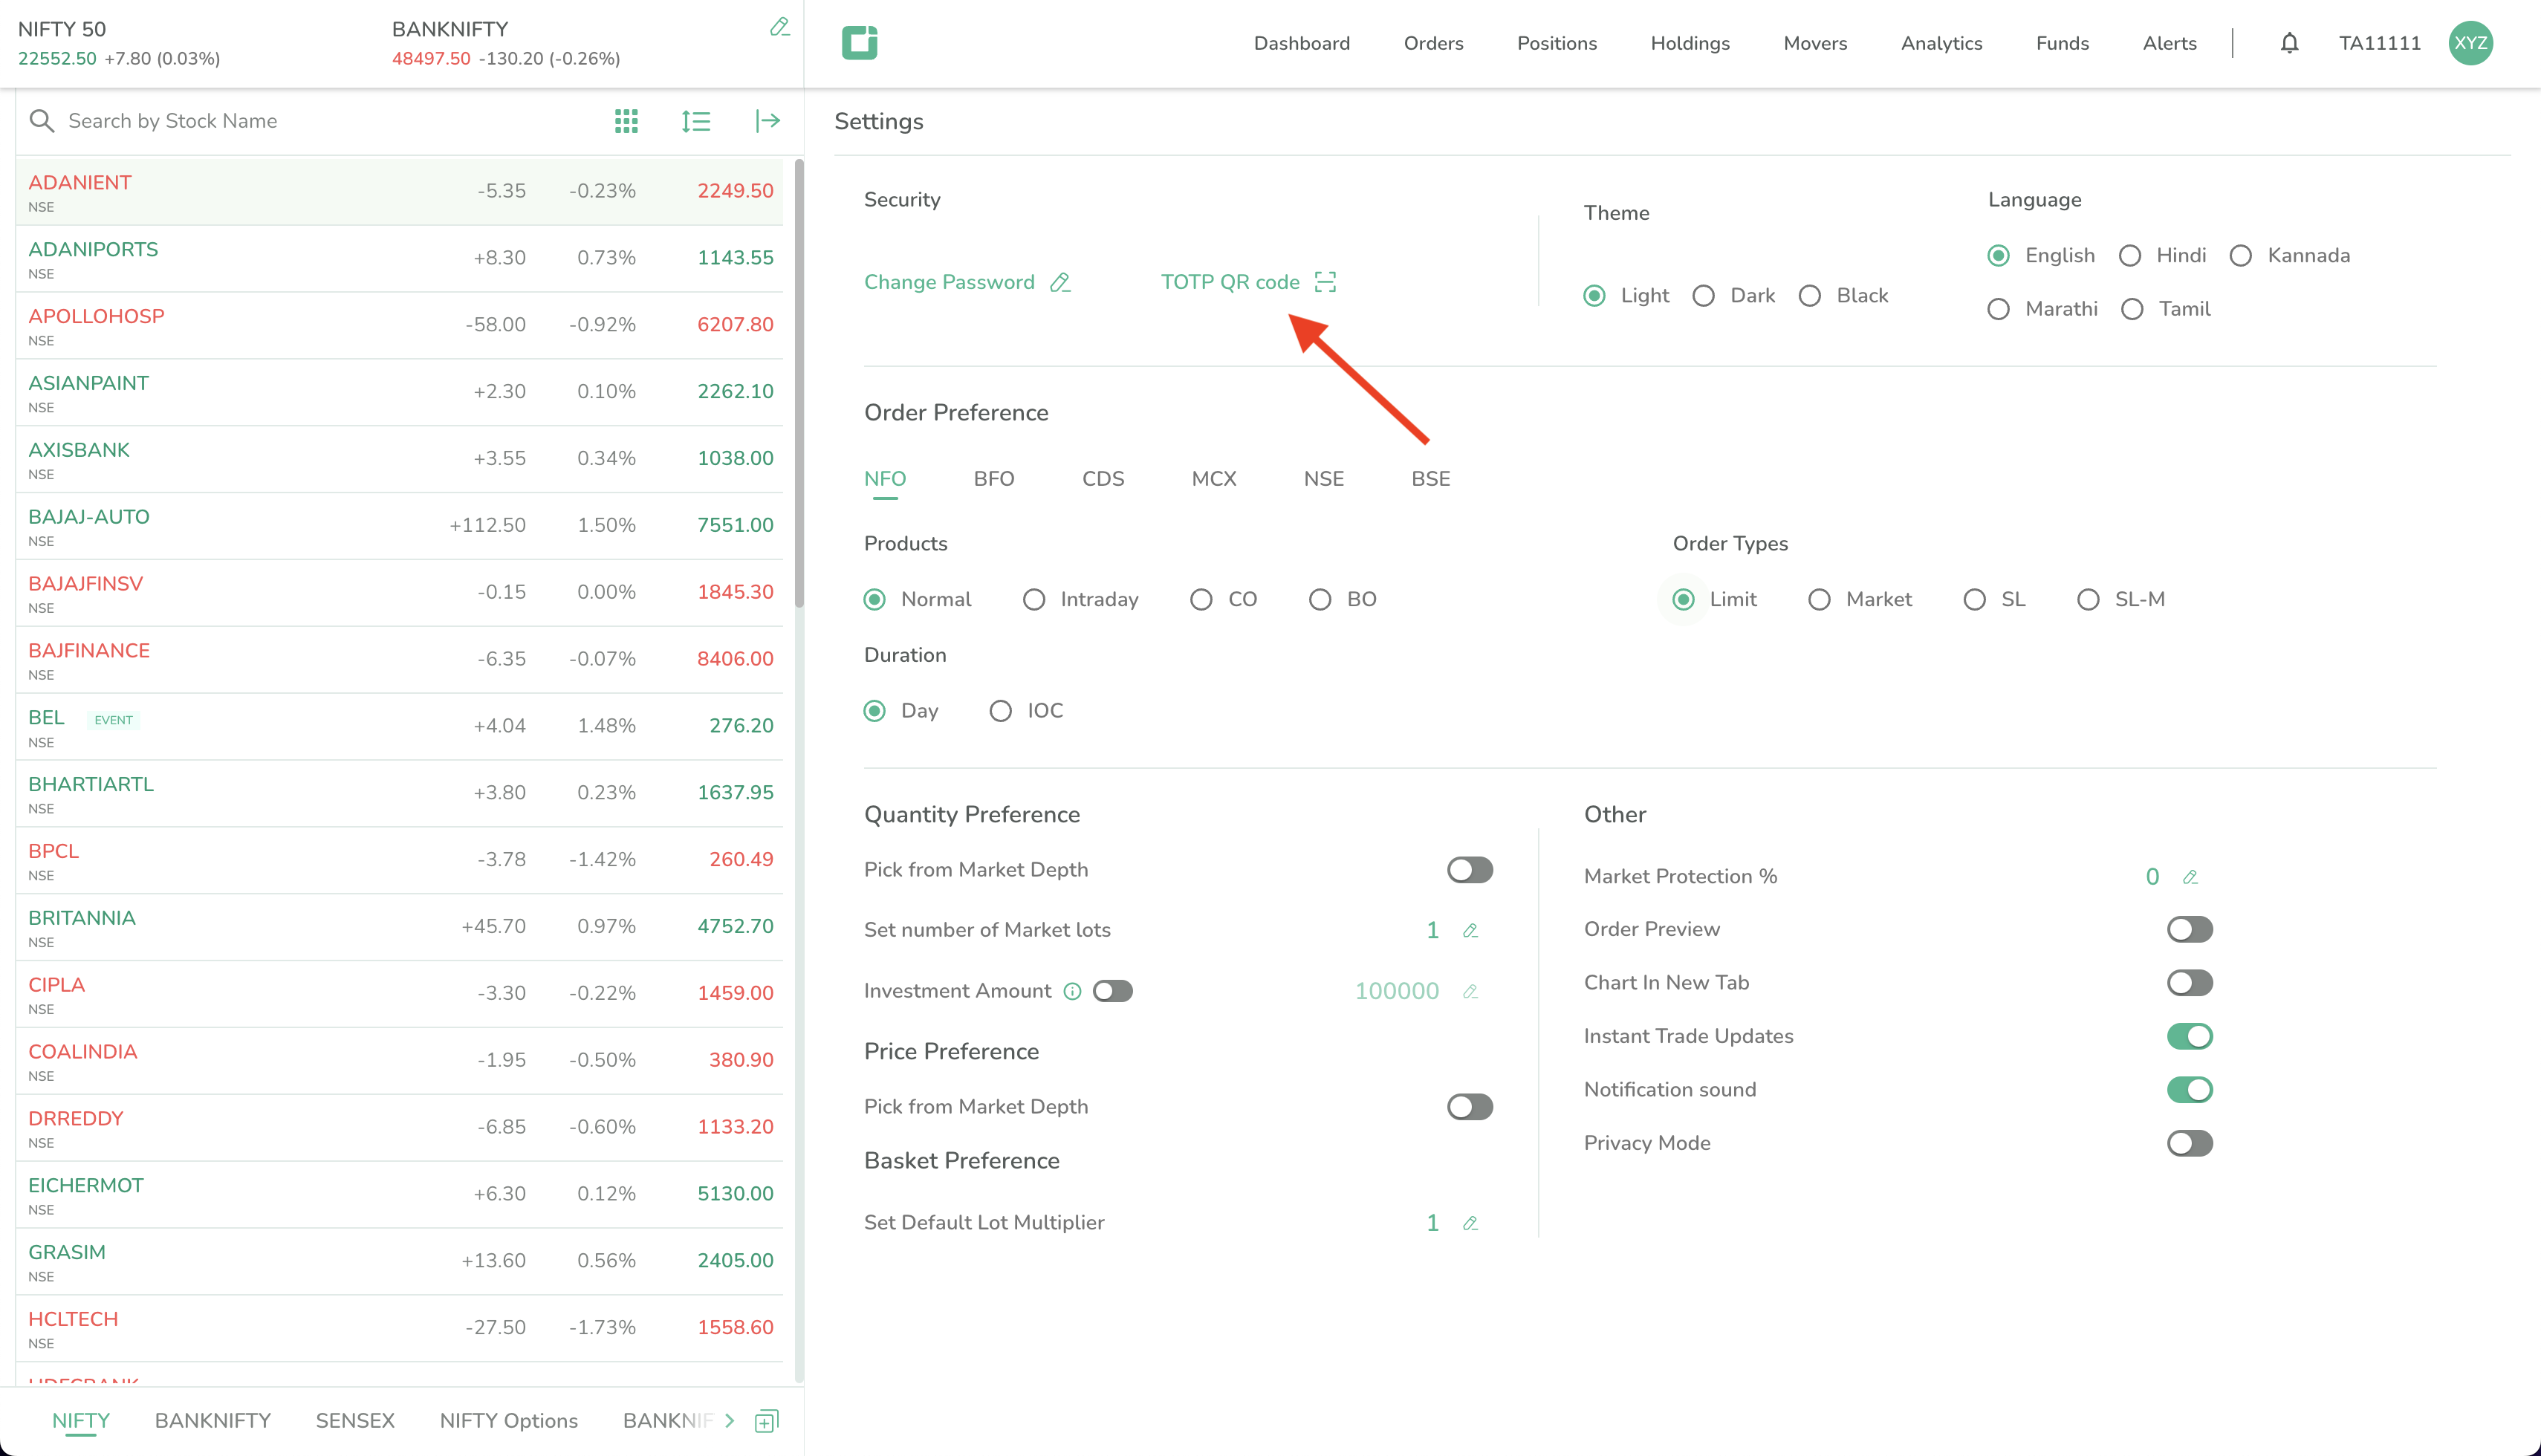
1. Login to Tradejini's CubePlus trading terminal.
2. Click on your Client id on the top right corner, and then click on Settings.
3. Click on TOTP QR code.
4. Enter the OTP received on your registered email id to confirm activation of TOTP.
5. After entering the OTP you will see a QR code. Download the Google Authenticator app on your mobile device from the app store/play store. Open the app and click the '+' add button. The camera will turn on, and scan the QR code that is shown on your Tradejini trading terminal. Once scanned you will start seeing a 6-digit TOTP.
III. API ACTIVATION & SETUP
1. Login to Tradejini's CubePlus trading terminal.
2. Go to the Developer Portal - https://api.tradejini.com/developer-portal/app/dashboard
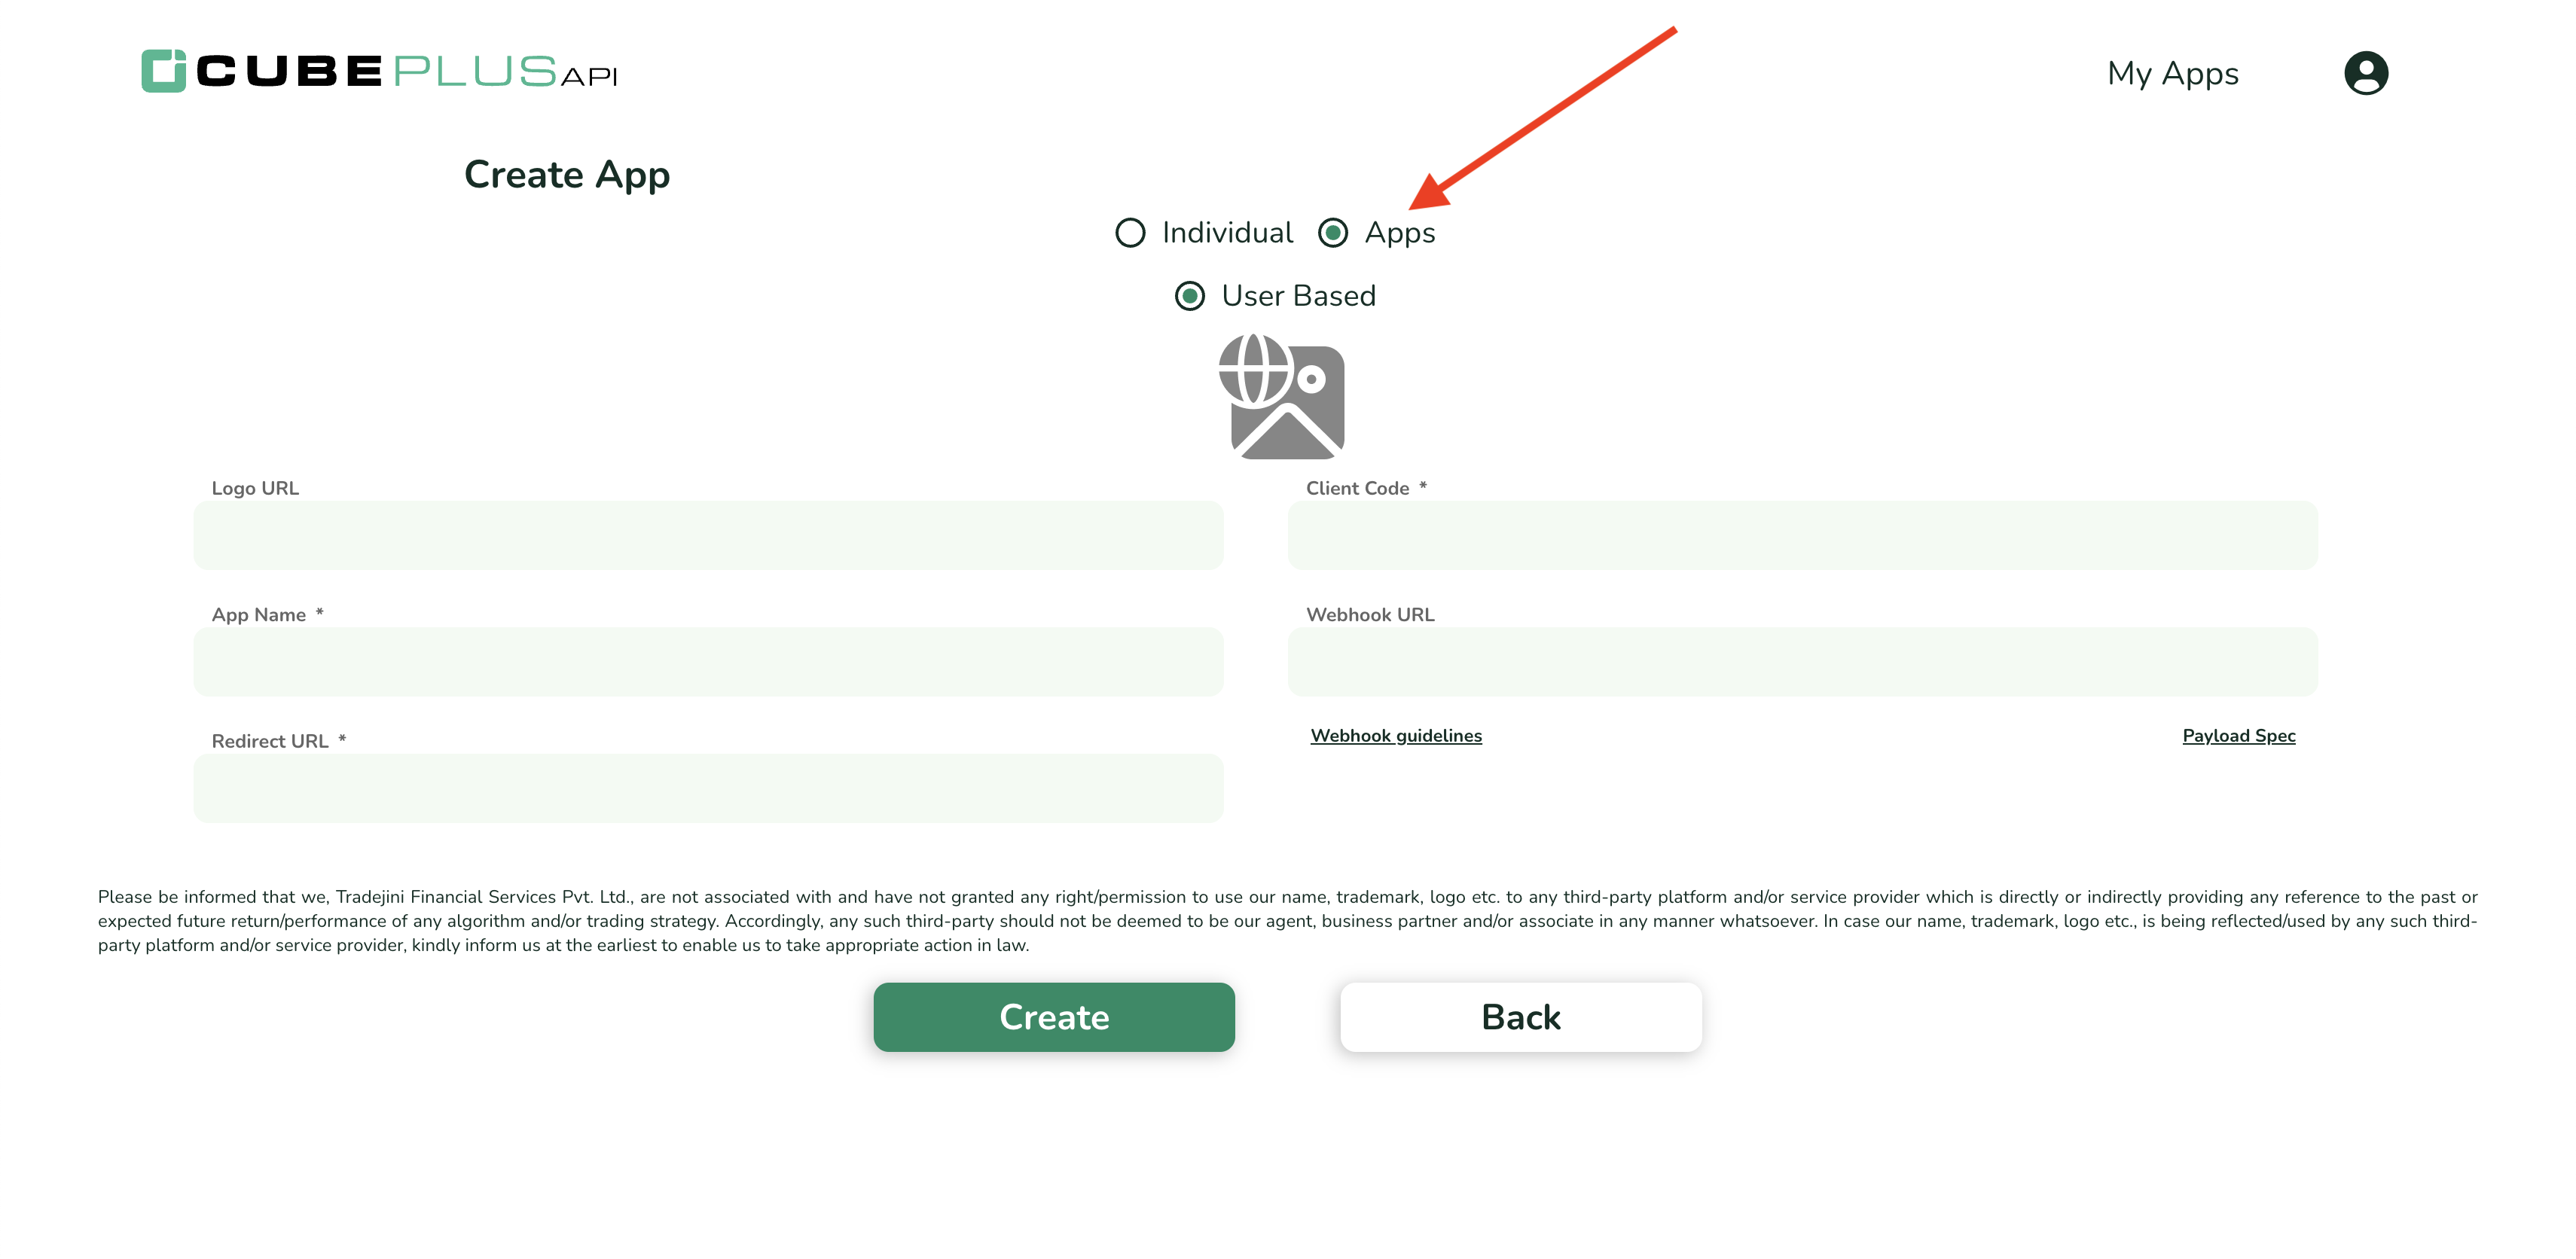
3. Click on the Create an App button
4. Click on the Apps option.
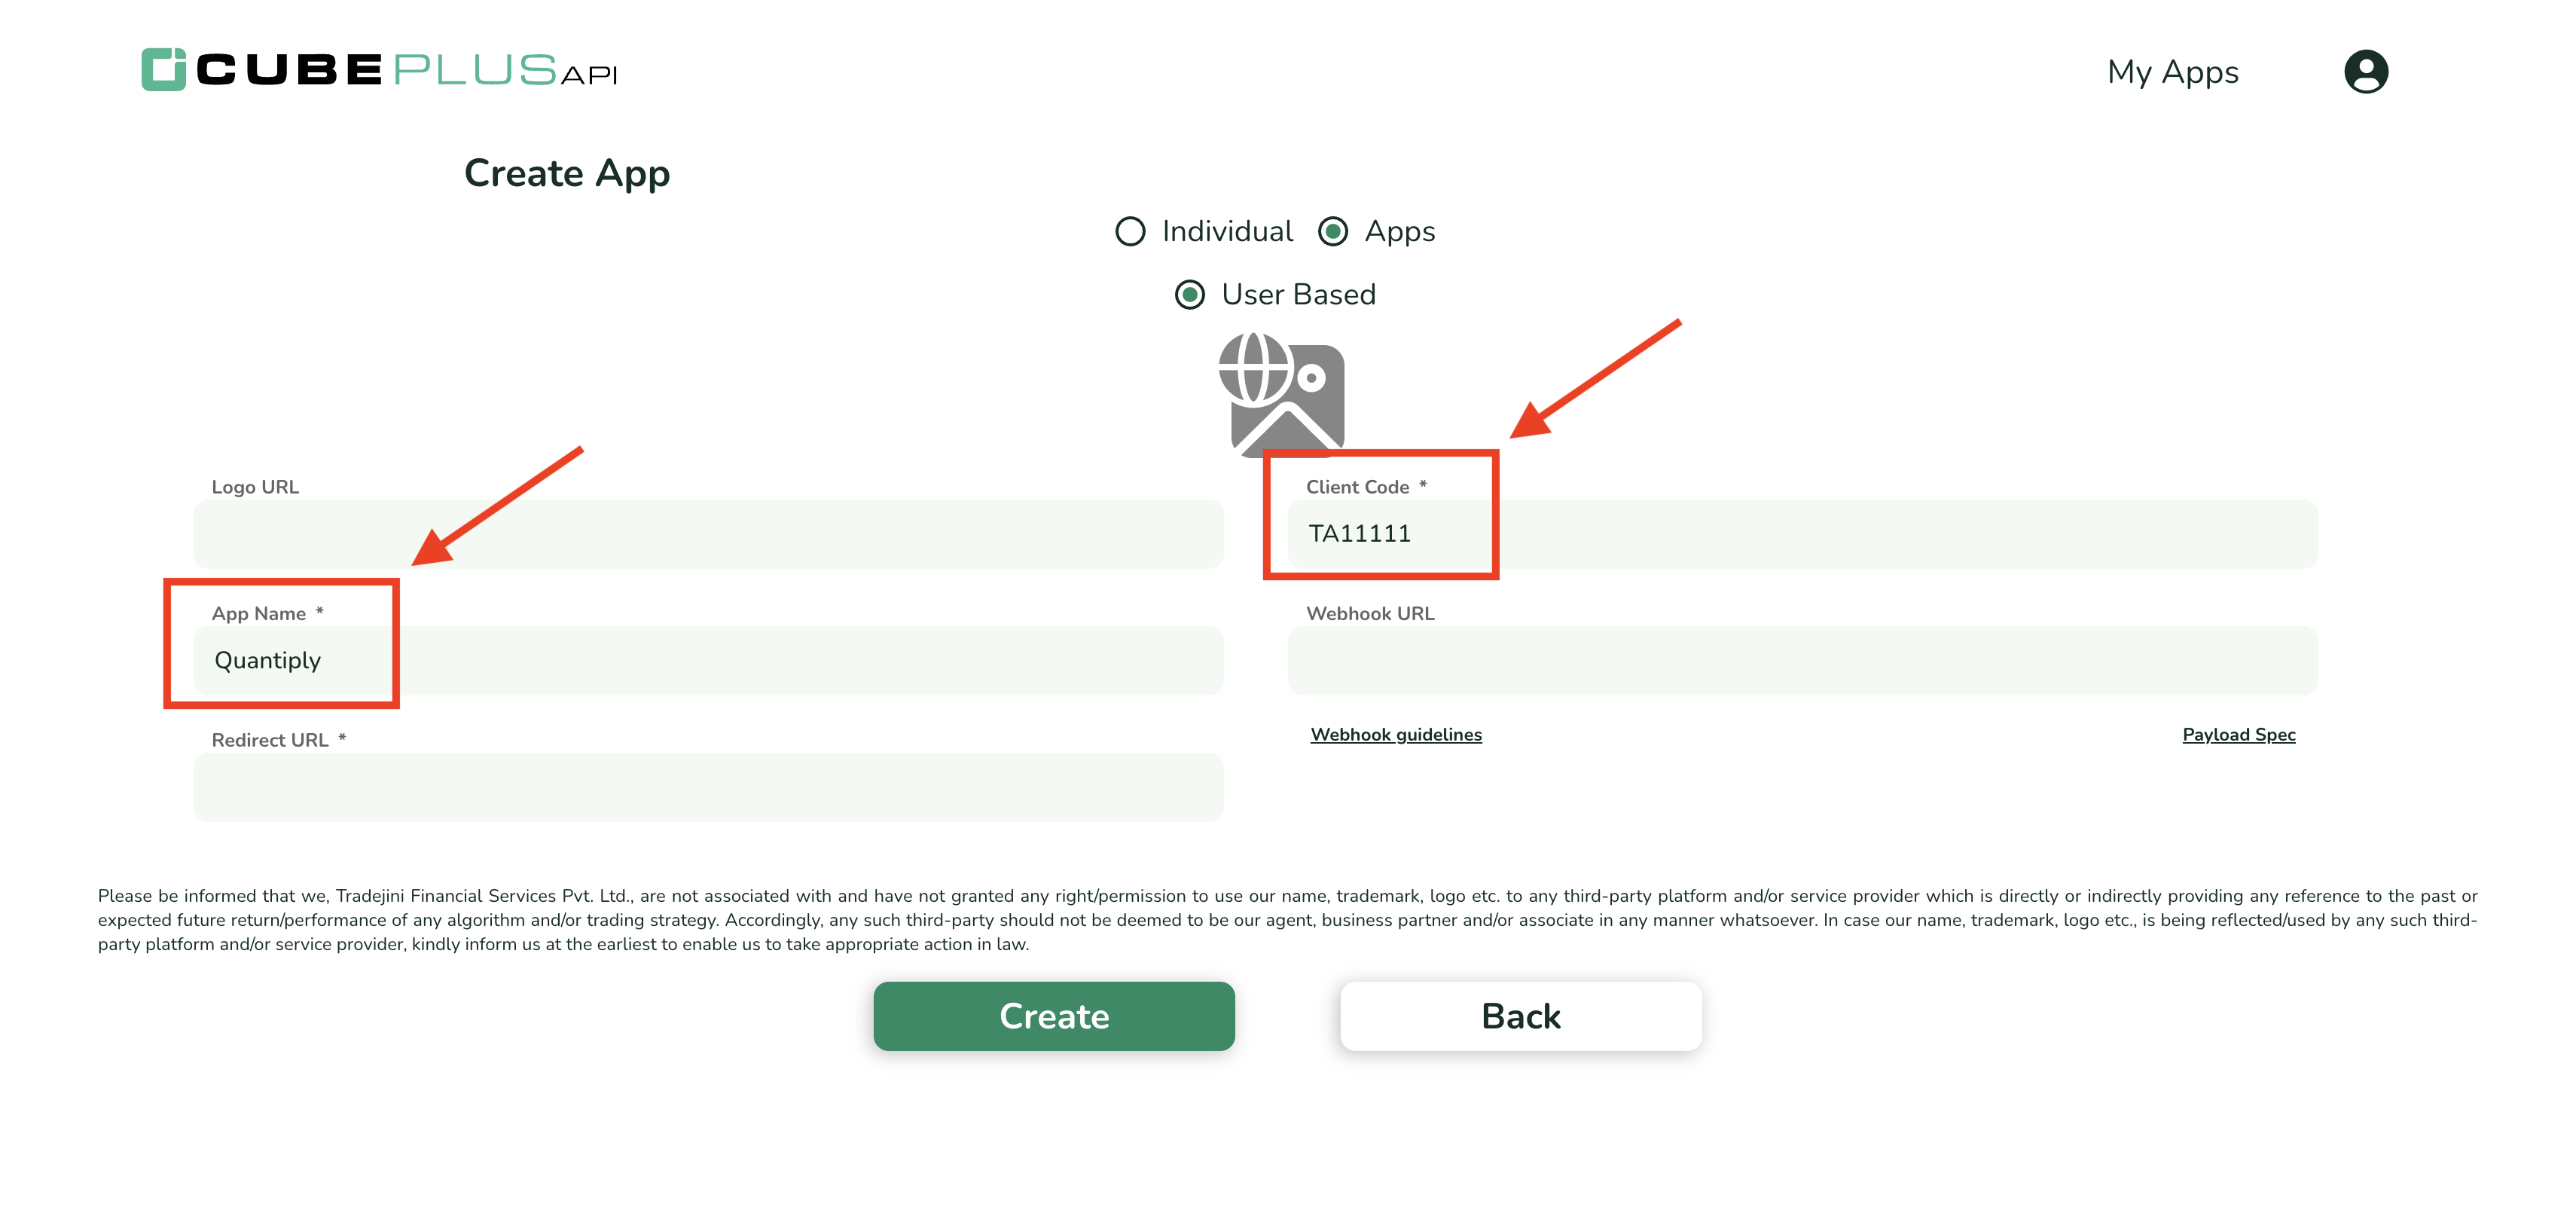
5. Enter your Tradejini Client ID under in the Client Code text box and enter a random name under the App Name text box.
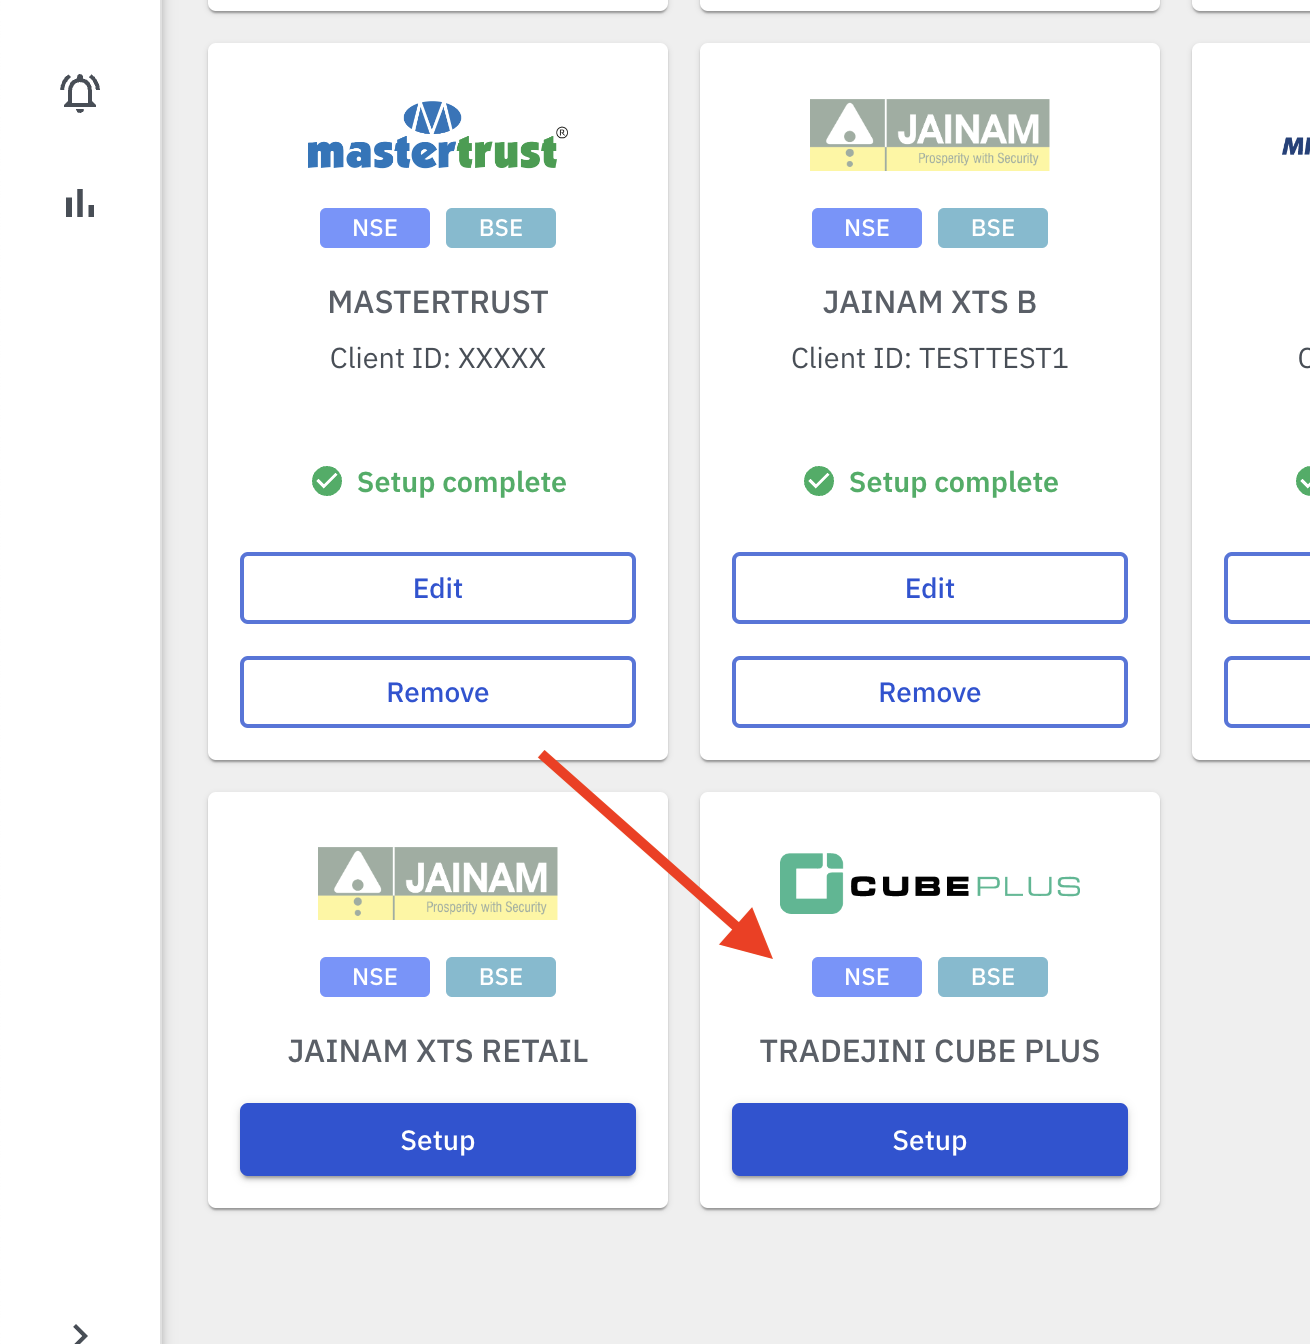
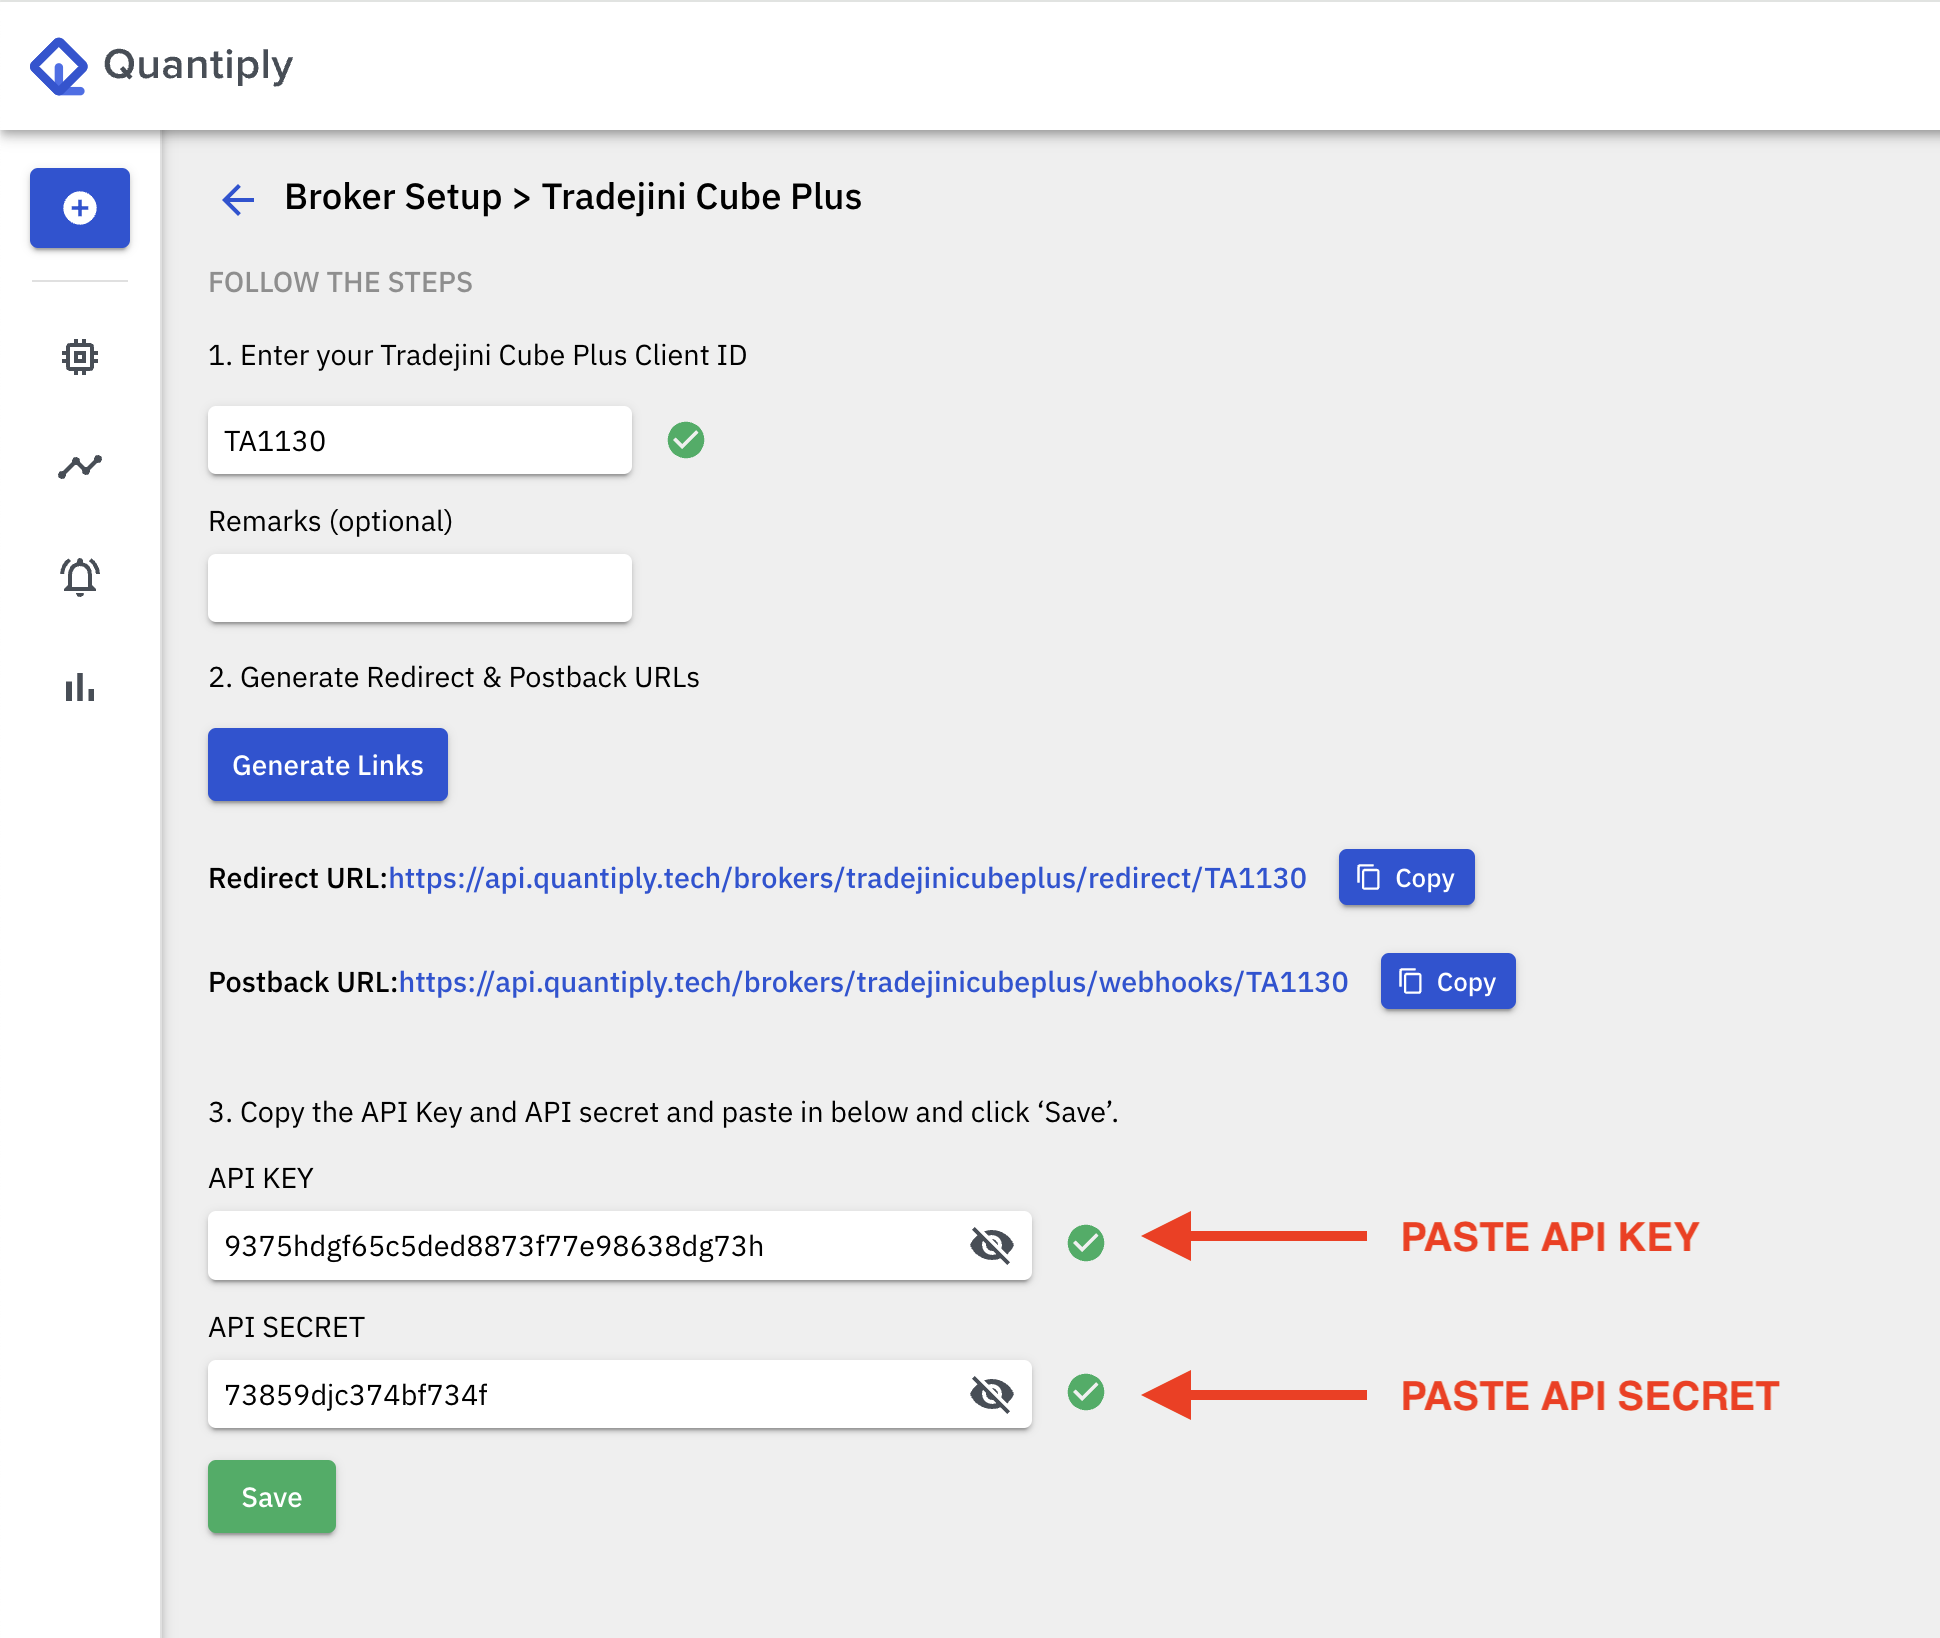
6. Now login to your Quantiply account and go to the Broker Setup page.
7. On the Broker Setup page, scroll down and find Tradejini Cube Plus and click on the Setup button under it.
8. On the setup page, first enter your Tradejini Client ID. And then click on the Generate Links button.
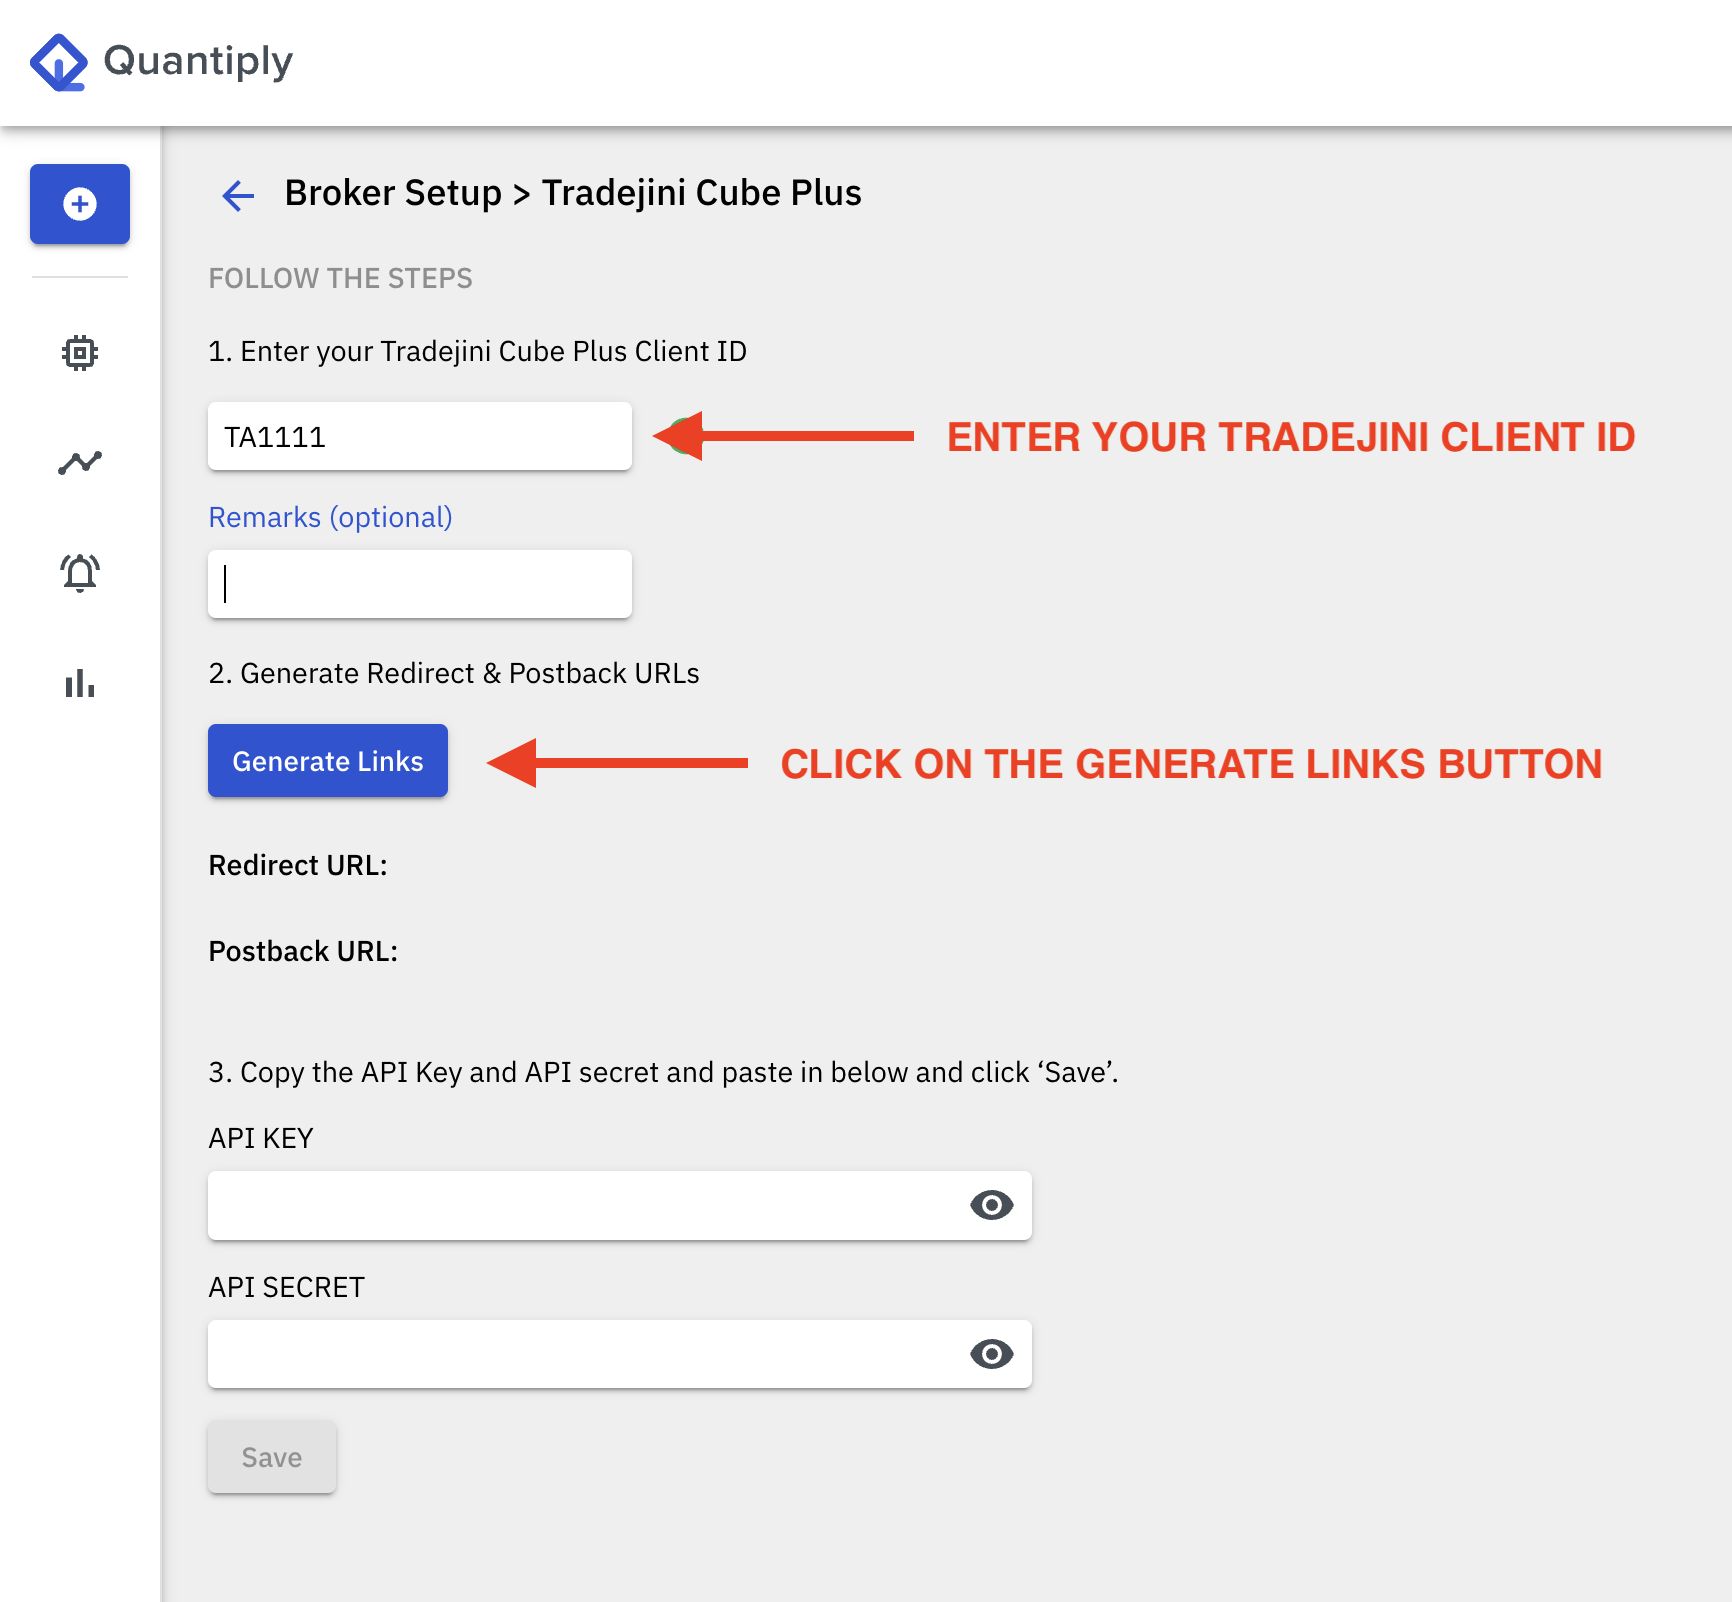
9. You will see the Redirect URL and Postback URL generated.
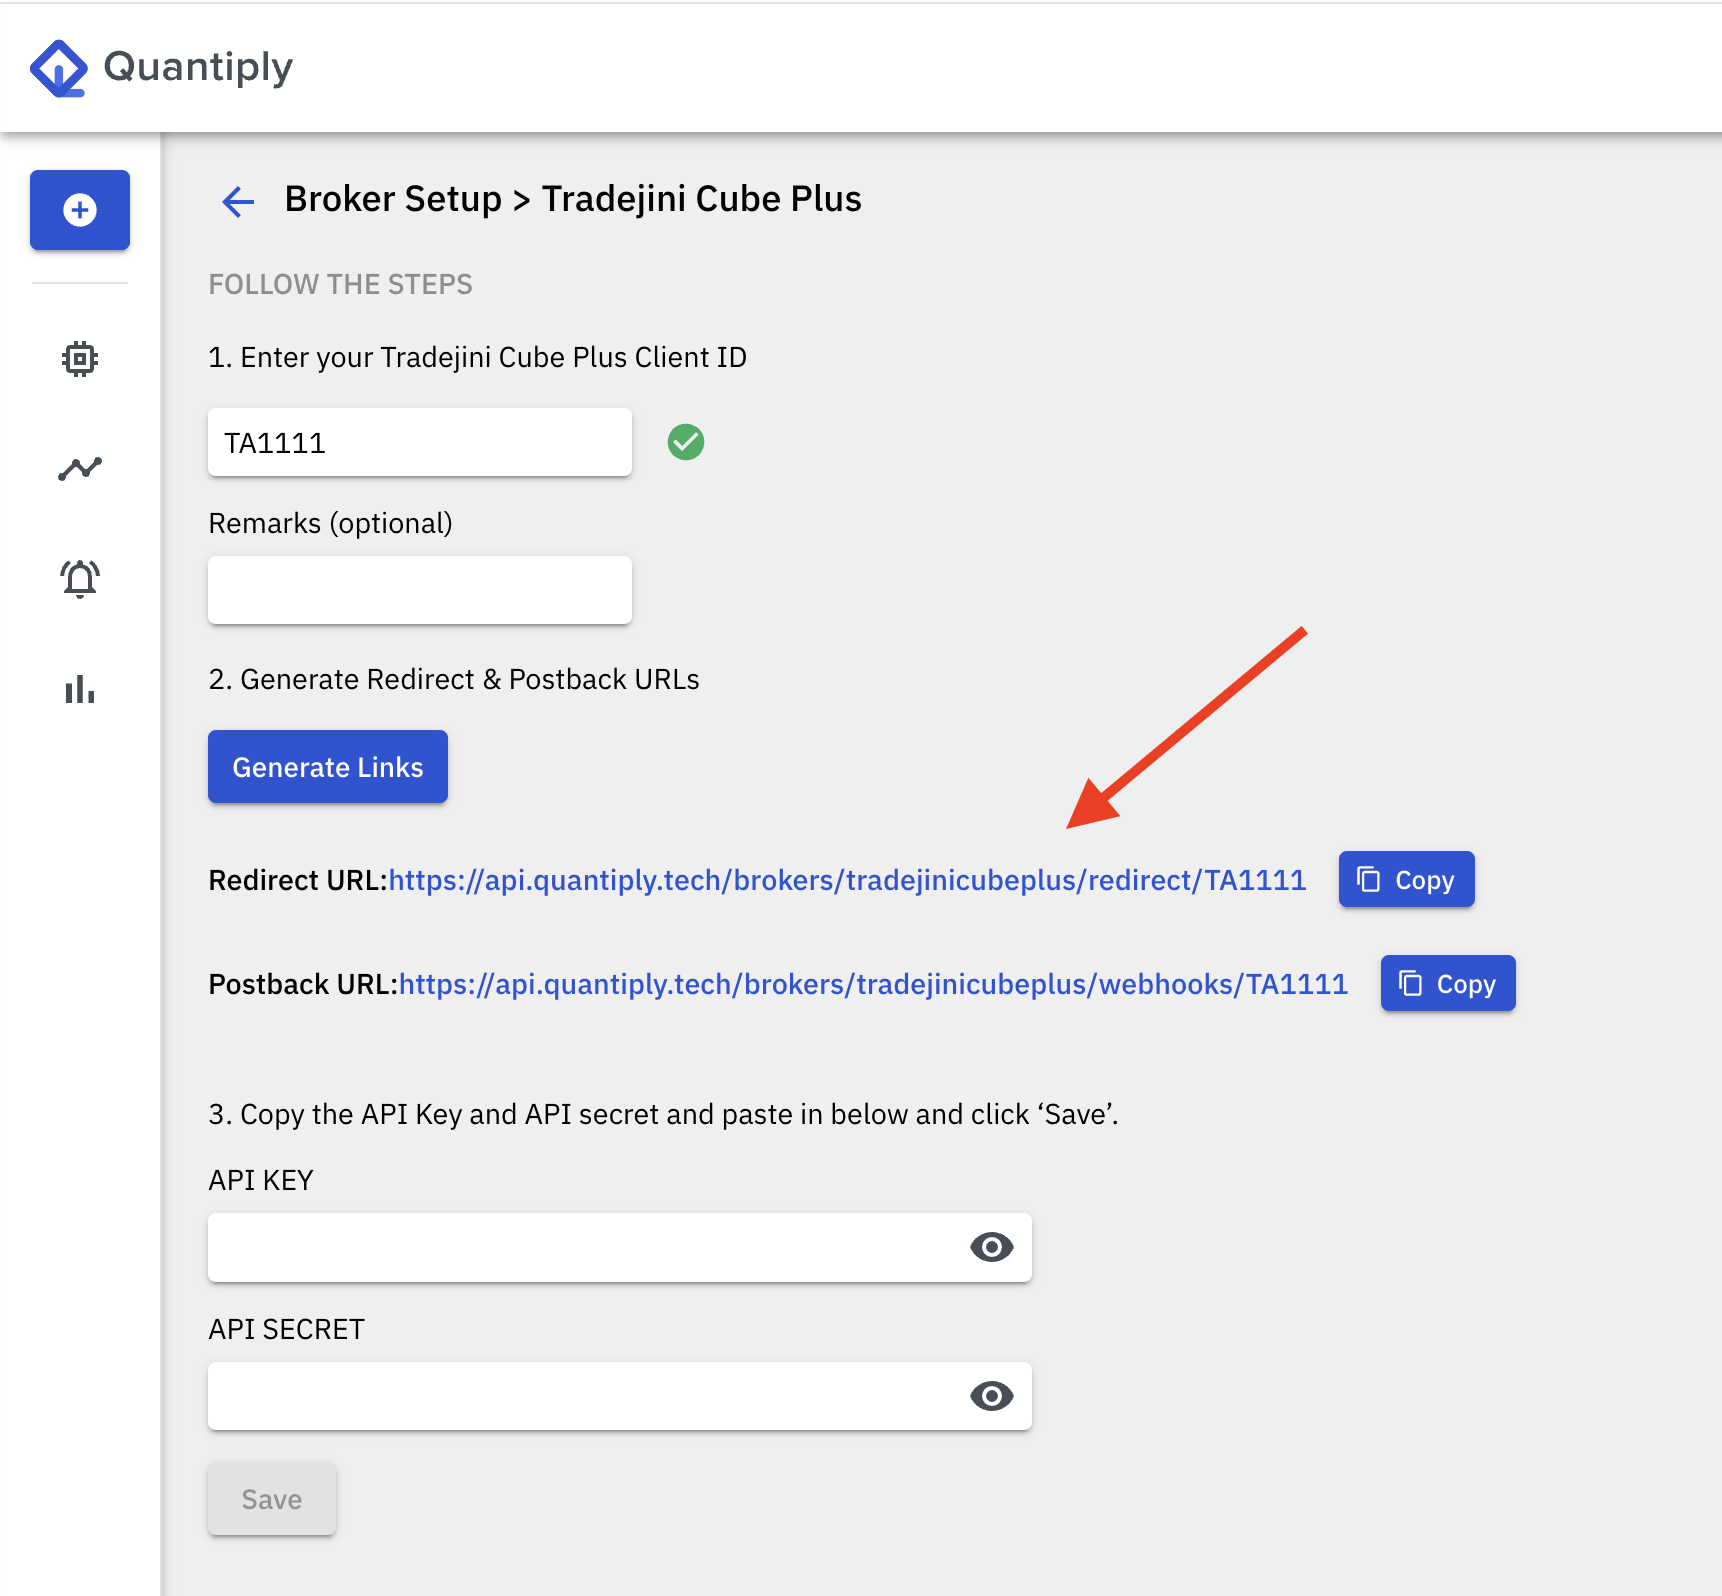
10. Copy the Redirect URL and paste it under the Redirect URL text box on the Tradejini Cubeplus developer portal. And then copy the Postaback URL from the Quantiply broker setup page and paste it under the Webhook URL text box on the Tradejini Cubeplus developer portal.
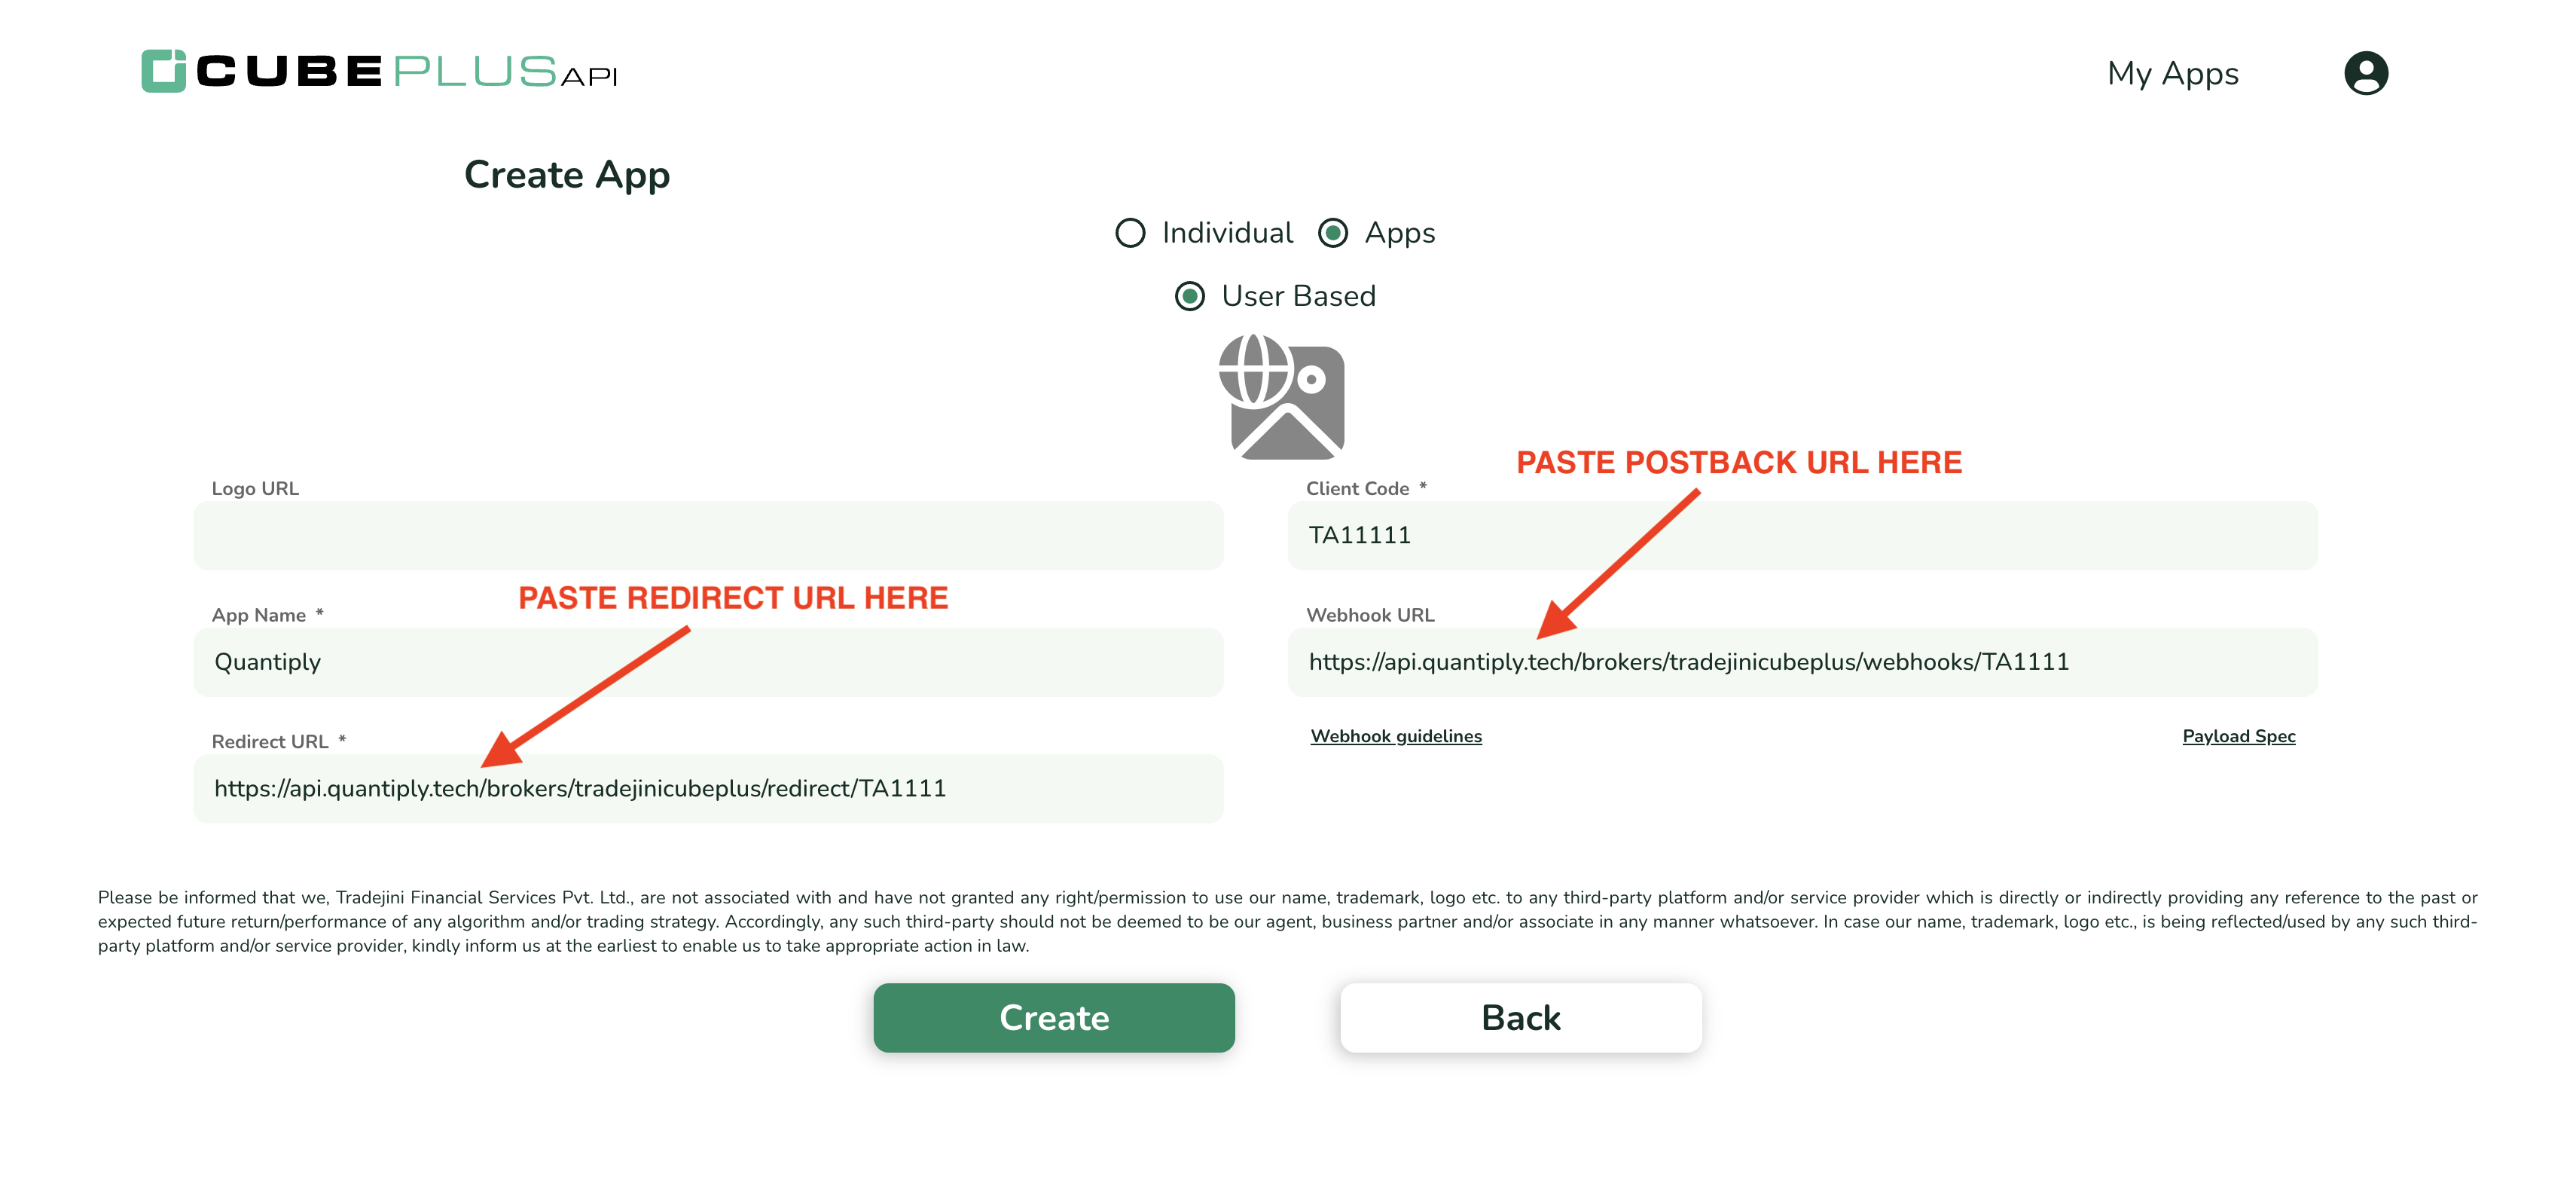
11. Click the Create button, and your new API app is created.
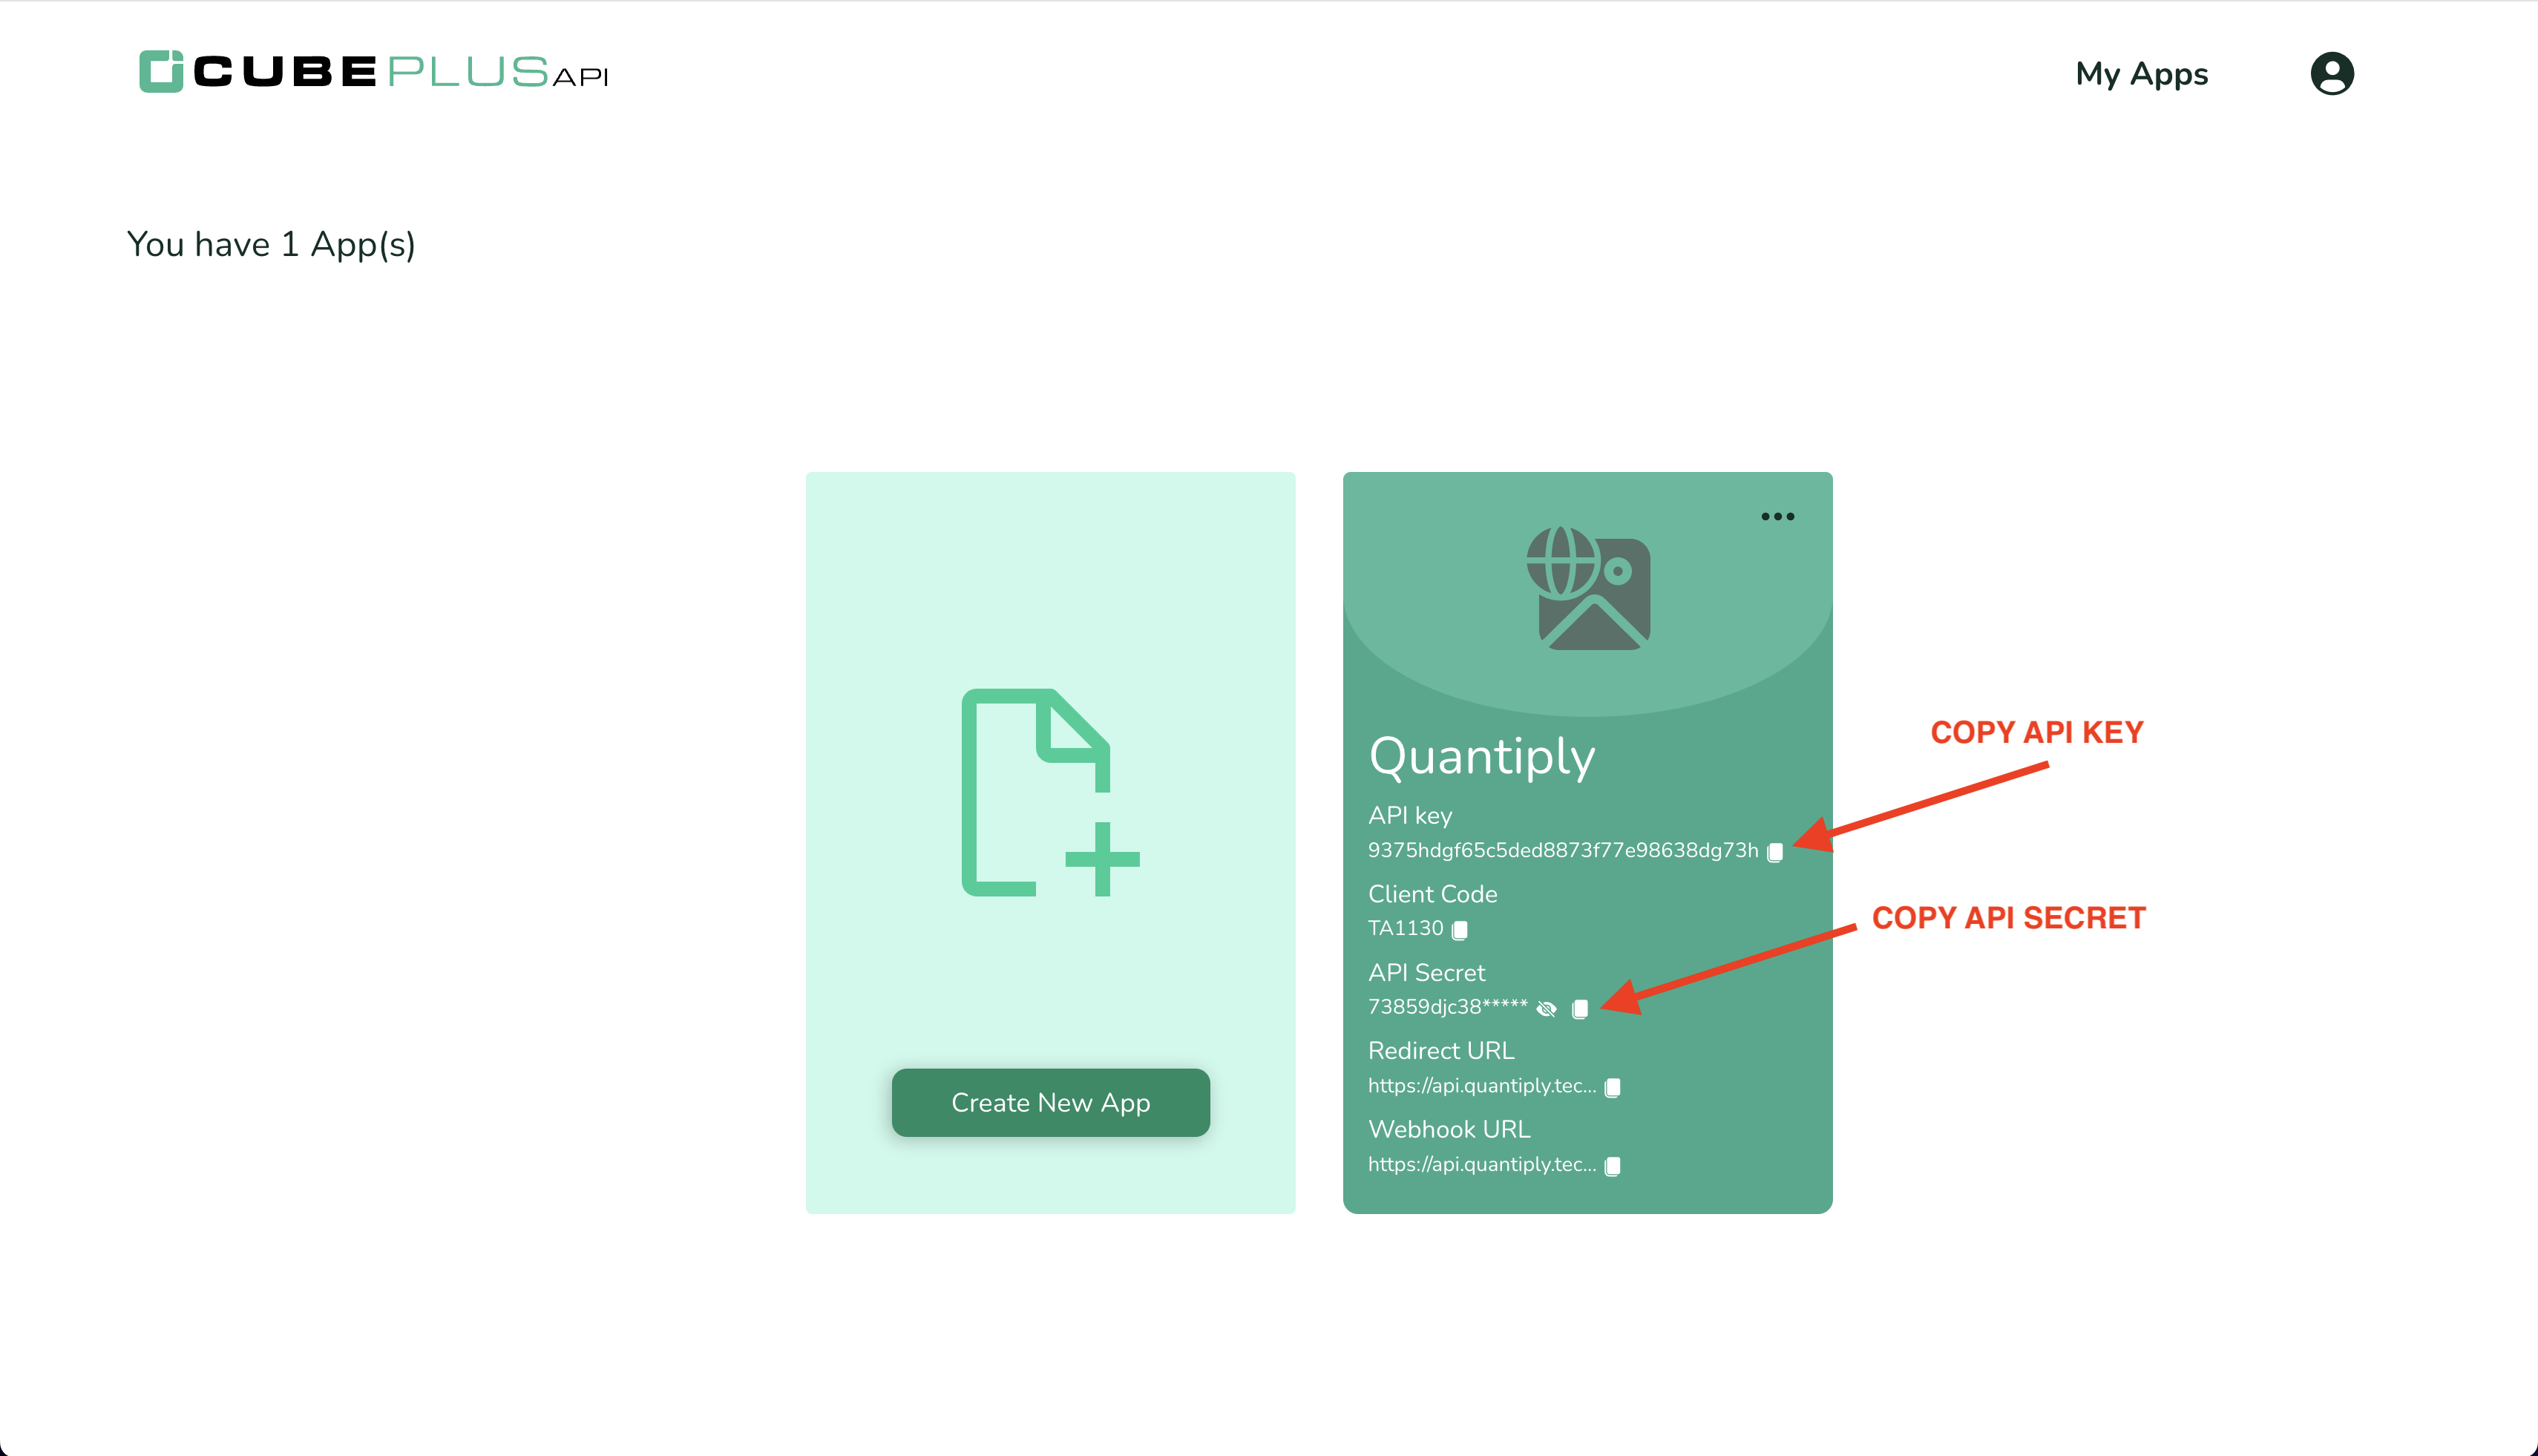
12. Now you will see the newly created API app with the API key and API secret. Copy the API key and paste it on the broker setup page on Quantiply under the API key text box and then copy the API secret from the newly created api app and paste it in the API secret text box on Quantiply's broker setup page. Click Save and your account setup is complete.
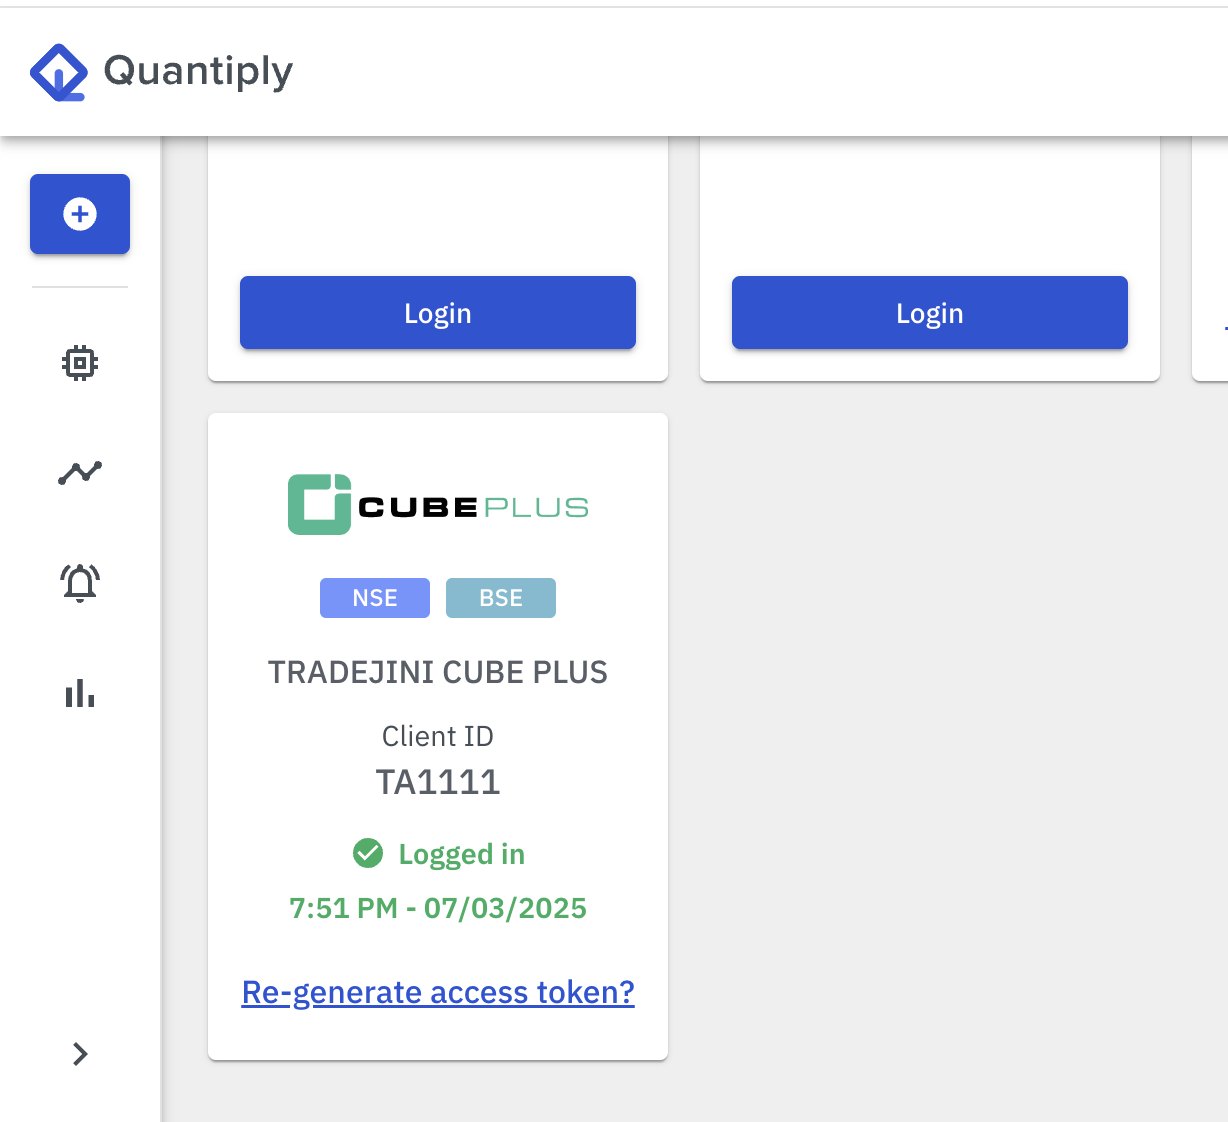
13. Once Saved, go to the Broker Login page, and do a trial login. If the login is successfully done you will see the message "Logged in".
For any queries or issues regarding the setup, get in touch with Quantiply Customer Support - https://quantiply.tech/contact